DIY Project: Framing a Bathroom Mirror Made Easy
Framing a bathroom mirror is an easy DIY project. It makes your bathroom more elegant and stylish. Follow this step-by-step guide to achieve a polished result.
Step 1: Measure the Mirror
Begin by measuring the mirror. Measure the width and height precisely. These proportions are essential for correctly framing a bathroom mirror.
Step 2: Choose Frame Material
Select a frame material that suits your bathroom decor. Wood, metal, or plastic are great options. DIY framing allows you to personalize the look.
Step 3: Gather Materials
Gather all necessary materials for framing a bathroom mirror. You’ll need the frame, adhesive, a saw, a measuring tape, and sandpaper. Having everything ready makes the DIY process smooth.
Step 4: Cut Frame to Size
Use a saw to cut the frame pieces. Cut according to your mirror’s dimensions. Be precise to ensure the frame fits perfectly.
Step 5: Sand the Frame Edges
Sand the edges of the frame pieces. This smooths out rough spots. A smooth frame is key when framing a bathroom mirror.
Step 6: Paint or Stain the Frame
Paint or stain the frame to match your bathroom style. Choose a color that complements the space. This DIY step adds personality to the project.
Step 7: Let the Frame Dry
Let the paint or stain dry completely. The drying time varies according to the type of paint or stain used. Patience is necessary for DIY framing.
Step 8: Clean the Mirror
Clean the bathroom mirror thoroughly. Use a glass cleaner to remove any dirt or smudges. A clean surface ensures proper adhesion.
Step 9: Apply Adhesive
Apply mirror adhesive to the back of the frame. Use adhesive specifically for mirrors. This ensures the frame sticks securely to the mirror.
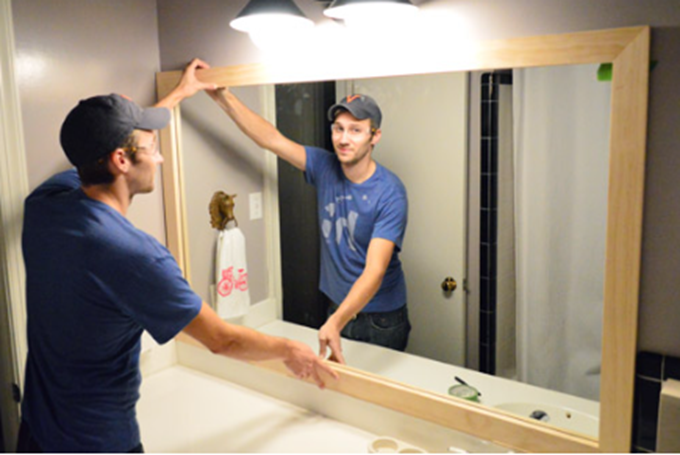
Step 10: Attach the Frame
Carefully attach the frame to the mirror. Align it perfectly with the mirror edges. Press firmly to secure the frame in place.
Step 11: Hold the Frame in Place
Hold the frame in place for several minutes. This helps the adhesive bond properly. You can use painter’s tape to hold it while drying.
Step 12: Let the Adhesive Set
Allow the adhesive to set for 24 hours. Follow the adhesive’s instructions for proper drying time. This step is crucial for a sturdy DIY framed mirror.
Step 13: Remove the Tape
Once the adhesive has dried, remove the painter’s tape. Check that the frame is securely attached. Framing a bathroom mirror is almost complete.
Step 14: Seal the Frame Edges
Use a clear sealant to seal the edges of the frame. Sealing prevents moisture from damaging the frame. This step extends the life of your DIY project.
Step 15: Clean the Mirror Again
Clean the mirror one last time. Use a gentle cleaner to wipe away dust or residue. A clean mirror makes your framed project stand out.
Step 16: Add Decorative Touches
Consider adding decorative touches to the frame. Small details like trim or metallic accents enhance the design. Framing a bathroom mirror allows for creativity.
Step 17: Inspect Your Work
Take a step back and look at your DIY framed mirror. Check for misalignment or gaps. Make minor modifications as needed.
Step 18: Maintain Your Frame
Regularly clean and maintain your framed mirror. Keep it free from dust and moisture. Proper care will keep your DIY framed mirror looking fresh for years.
Framing a bathroom mirror is an easy DIY project that upgrades your bathroom. It adds style and personality with just a few steps. With the right materials and patience, you’ll achieve a professional-looking result. This project is perfect for anyone looking to improve their bathroom decor on a budget.