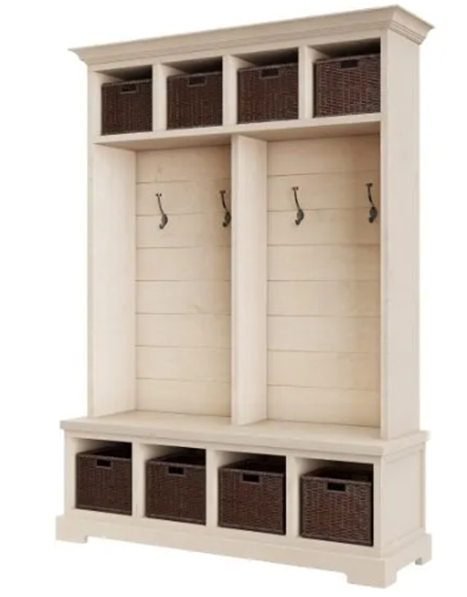
How to Make a Mudroom Bench: DIY Guide
Creating a mudroom bench is a great DIY project. It adds storage, seating, and style to your entryway. Here’s a detailed plan, including supplies, design, and steps.
Supplies You’ll Need:
- Plywood or solid wood boards
- Measuring tape
- Wood screws
- Drill
- Wood glue
- Saw (circular or hand saw)
- Sandpaper
- Paint or stain
- Paintbrushes
- Brackets (optional for extra support)
- Cushion or fabric (optional for comfort)
Step 1: Design Your Bench
Decide on the bench design. It should fit your space and style. A simple, sturdy structure works best.
Step 2: Choose Dimensions
Measure the space for your bench. Standard height is about 18 inches. A depth of 16-20 inches provides comfortable seating. Length depends on available space.
Step 3: Cut the Wood
Cut the plywood or wood boards to size. You’ll need pieces for the seat, back, sides, and bottom shelf. Precise cuts are key in a DIY bench project.
Step 4: Sand the Wood
Sand all wood pieces until smooth. This prepares them for assembly. Sanding also helps the paint or stain adhere better.
Step 5: Build the Frame
Assemble the bench frame first. Start by attaching the sides to the bottom shelf. Use wood screws and wood glue for extra strength. The frame forms the foundation when creating a mudroom bench.
Step 6: Attach the Back and Seat
Attach the back panel to the frame. This provides support. Then attach the seat to the top of the frame. Secure everything with screws.
Step 7: Add Bottom Shelf for Storage
Install the bottom shelf between the side panels. This provides a space for shoes or baskets. Creating a mudroom bench with storage makes it more functional.
Step 8: Add Optional Armrests or Brackets
Consider adding armrests for style or extra comfort. Use brackets for added support, if needed. DIY bench customization is part of the fun.
Step 9: Sand Again
Sand any rough edges after assembly. This ensures a smooth finish. A well-sanded bench makes your DIY project look professional.
Step 10: Paint or Stain
Apply paint or stain to your bench. Choose a color that matches your mudroom decor. Painting adds a polished look to your DIY mudroom bench.
Step 11: Let the Paint Dry
Allow the paint or stain to dry completely. Follow the instructions for drying time. Drying properly prevents smudges and imperfections.
Step 12: Apply a Sealant
Use a clear sealant to protect the wood. A sealant adds durability, especially for high-traffic areas. Sealing is essential when creating a mudroom bench.
Step 13: Add Cushion or Fabric (Optional)
Add a cushion to the seat for added comfort. Choose a fabric that is both sturdy and easy to clean. This makes your DIY bench more comfortable and welcoming.
Step 14: Step Back and Review
Take a step back to enjoy your effort. Make sure the bench is strong and secure. Make any necessary changes to the little details.
Step 15: Organize and Decorate
Organize your mudroom around the bench. Add baskets or hooks for coats and shoes. A DIY mudroom bench transforms your entryway into a functional space.
Step 16: Share Your DIY Success
Share photos of your finished mudroom bench. Show off your DIY skills. You might inspire others to create a mudroom bench too.
Final Dimensions for a Standard Mudroom Bench:
- Height: 18 inches (standard seating height)
- Depth: 16-20 inches (comfortable for sitting)
- Length: Customizable based on available space
Extra Tips for Success:
- Use sturdy wood for durability.
- Measure carefully before cutting.
- Choose a stain or paint that resists wear.
Creating a mudroom bench is an excellent DIY project for any home. It adds storage and seating, making your entryway more functional. With careful planning and effort, you’ll create a beautiful, useful bench.